Batch Processing via the greenID Admin Panel
- Murat Altikulac (Unlicensed)
- Sharmeen Hussain
- Ming Chen (Unlicensed)
- Anonymous
Administrators have the ability to process a small batch file (up to 20,000 records) via the greenID admin panel where you can upload a file containing the individuals Name and Address and DoB information to be checked against non consent data sources / watchlists and or against the Australian Death Check service.
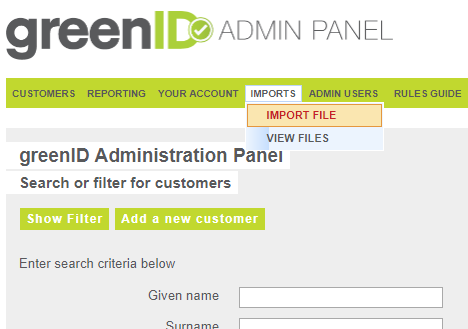
1.You can start the batch process by clicking into the IMPORTS menu, followed by IMPORT FILE.
(If the IMPORTS menu option is not available to you, please contact customer.support@gbgplc.com to enable this).
2. Next step is to upload the file. We have several batch formats that can be uploaded and they can be downloaded from here:
AU_greenID_import_template.csv
AU_greenID_import_template_DVS_drivers_licence_with_card_number.csv
AU_greenID_import_template_Australian_death_check.csv
NZ_greenID_import_template.csv
AU_greenID_import_template_split_address.csv
NZ_greenID_import_template_split_address.csv
GB_greenID_import_template_split_address.csv
batch_upload_sample_watchlistonly.csv
batch_upload_sample_watchlistonly_country.csv
Single_rule_and_address_configured_ADC.csv
Single_rule_and_no_address_configured_ADC.csv
Multi_rule_and_address_configured_ADC.csv
Multi_rule_and_no_address_configured_ADC.csv
It’s important that the template column headers are not modified as greenID has been programmed to look for these column names and process the file accordingly.
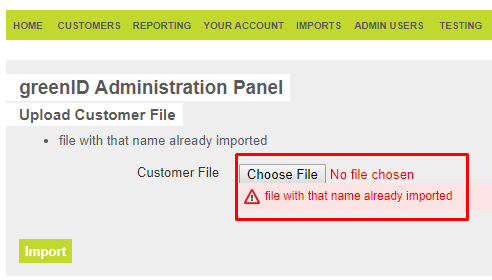
3. Once the file is completed and ready to upload, please ensure that the file has a unique file name.
4. If you upload a file with a similar name as a previous file, greenID will show an alert to advise that a file with that name has already been imported eg below:
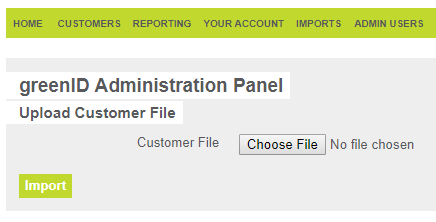
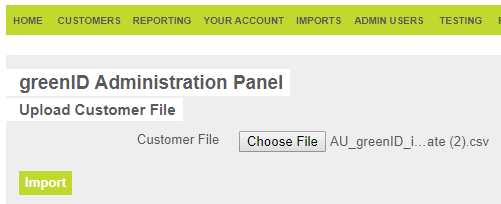
5. Once you have selected the right file, click on the Import button.
6. If the file has been imported correctly, you should see the number of records imported. If you see a zero (0), that means that there was an error with your file and you should open and check to see if the format is correct and all columns are completed.
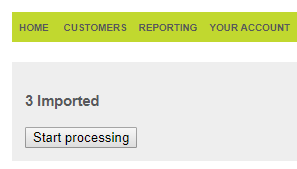
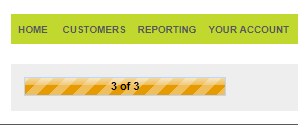
7. Once you are ready, click on “Start processing’ button to begin the batch process. Depending on the number of records, this may take some time.
8. Once greenID has finished processing the file, you will see a completed message and also links to two options:
- Download Summary – clicking on this will open a summary page that requires further development work from our team and should be ignored for now.
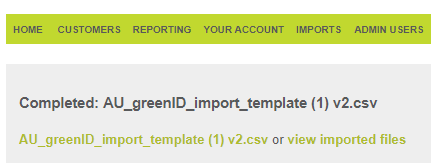
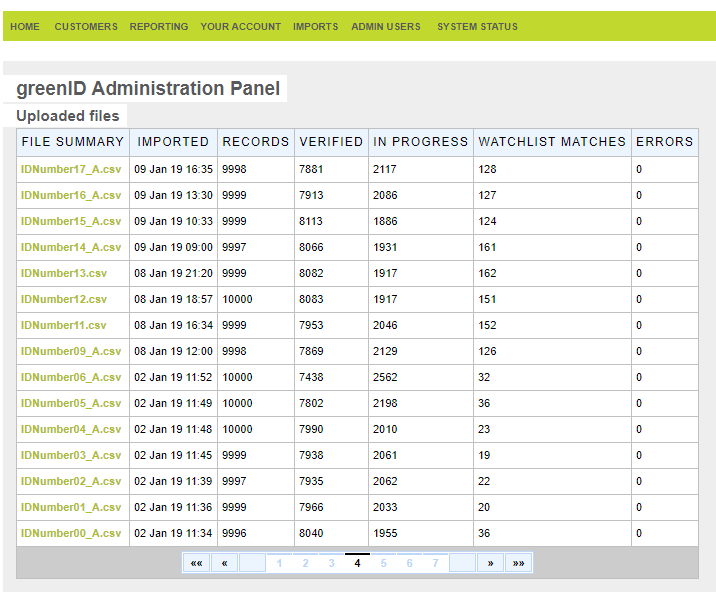
2. View imported files – will display a page that shows all files uploaded to greenID and a summary showing how many were verified in accordance with the overall verification rule. Click on a File Summary for a summary of each verification for that specific batch.

9. To export a report of the batch showing each record and what they matched on, you will need to go back to the main home screen and click on Show Filter and set the date period to the day you performed the back. Once the results are populated you can then export the results to excel or CSV file format.